ℹ Welcome to Hope Tree
Welcome to Hope Tree! This guide will help you discover all the features of this personal goal-tracking and journaling app. Learn how to visualize your dreams, track your progress, and build better habits.
Your Privacy Matters
Hope Tree is completely free and ad-free. All your goals, reflections, and journal entries are stored only on your device. Your personal information never leaves your phone - it's completely private.
What You'll Learn:
- Goal Tracking with Visual Tree Growth
- Daily Journaling with Calendar View
- Reflection System
- Action Items and Tools
- 14 Beautiful Themes
- Complete Offline Functionality
- Local-Only Data Storage
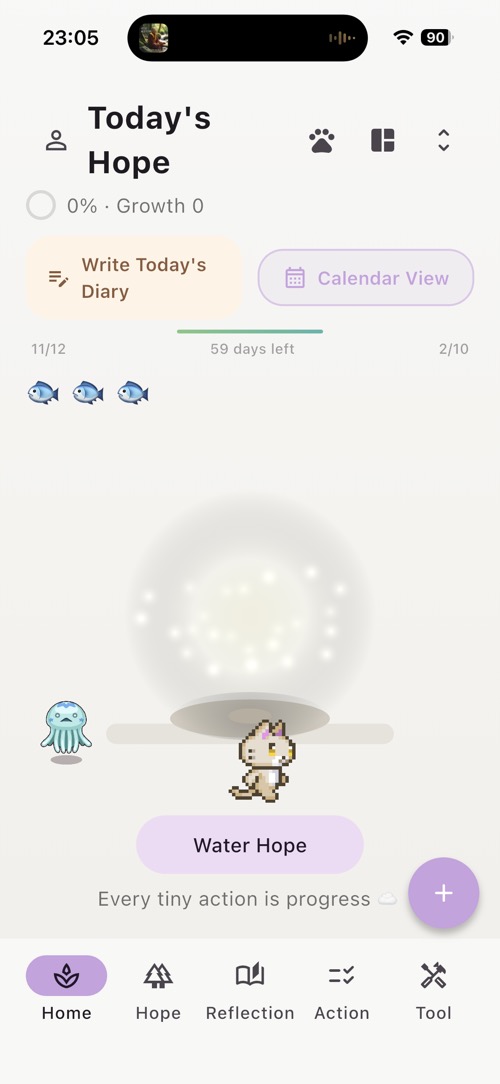
1 Exploring the Home Screen
Start by familiarizing yourself with the main interface and navigation.
- Launch Hope Tree to see the home screen
- Observe the tree visualization at the top
- Notice the bottom navigation bar with 5 tabs
- Tap each tab to explore: Home, Hope, Reflection, Action, Tool
- The tree grows as you add and complete goals
Interactive Elements - Try These Fun Features:
- Tap on the cat - The cat will react with cute animations
- Drag the toy from the bottom left corner - Move it around to play with the cat
- Drag the fish from the top left corner - Feed the companion by dragging the fish
- Experiment with these interactive elements to discover delightful animations
Pro Tip
The tree represents your journey - as you add goals ("hopes") and make progress, your tree grows more vibrant and beautiful. The interactive cat companion adds a playful touch to keep you motivated!
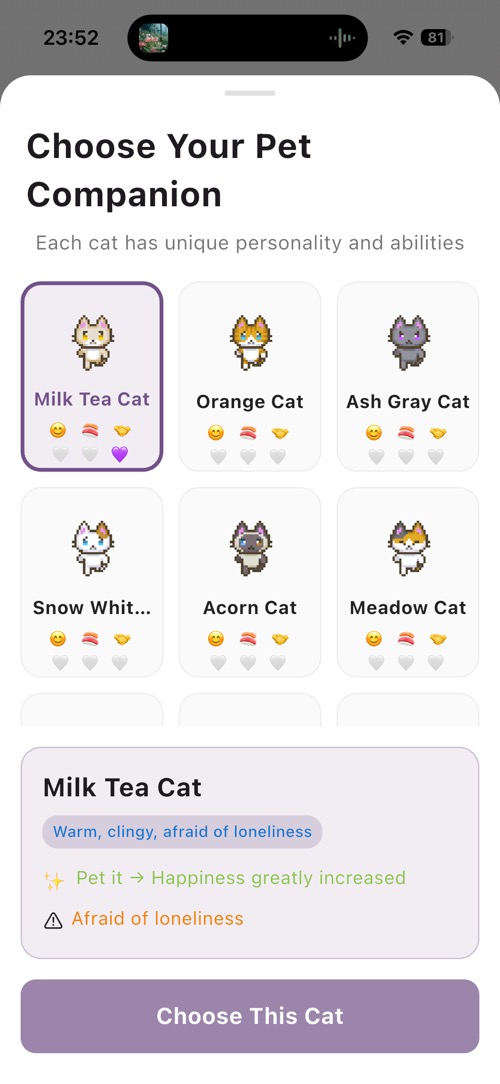
2 Selecting Your Pet Companion
Personalize your experience by choosing your favorite pet companion.
- On the home screen, look for the cat paw icon in the top right corner
- Tap the cat paw icon to open the pet selection menu
- Browse through the available pet options
- Tap on any pet to select it as your companion
- Your chosen pet will appear on the home screen
- You can change your pet anytime by tapping the paw icon again
Pet Companions:
Your pet companion adds personality and encouragement to your goal-tracking journey. Different pets bring different vibes to keep you motivated!
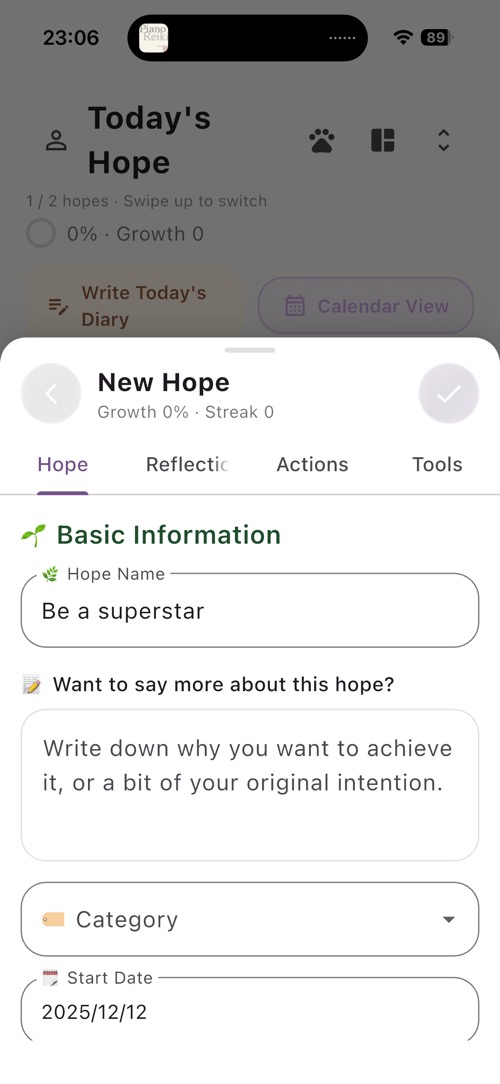
3 Creating Your First Hope (Goal)
Learn how to create your first goal by adding a new "hope" to your tree.
- Tap the "Hope List" tab in the bottom navigation
- Tap the "+" button to create a new hope
- Enter a goal title (e.g., "Learn a new skill")
- Add a description or notes (optional)
- Set a target date if desired
- Tap "Save" to add the hope to your list
- Return to home screen to see the tree update
Hope Management:
Each hope represents a goal or aspiration. You can add multiple hopes, track their progress, and watch your tree grow as you work towards them.
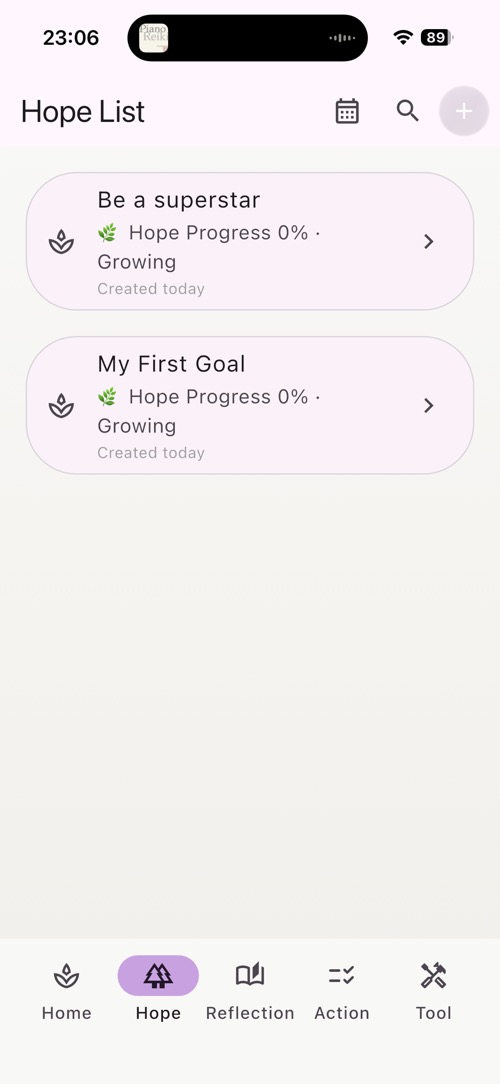
4 Managing Your Hope List
Explore the hope list view and individual hope details.
- Go to "Hope List" tab to view all your hopes
- Tap on any hope item to view its details
- Review the hope page showing progress and actions
- Tap on a hope item in the list to delete it
- Note: Deletion is permanent and cannot be undone
Local Storage
All hopes are stored exclusively on your device. No data is synced to any servers or cloud services, ensuring complete privacy.
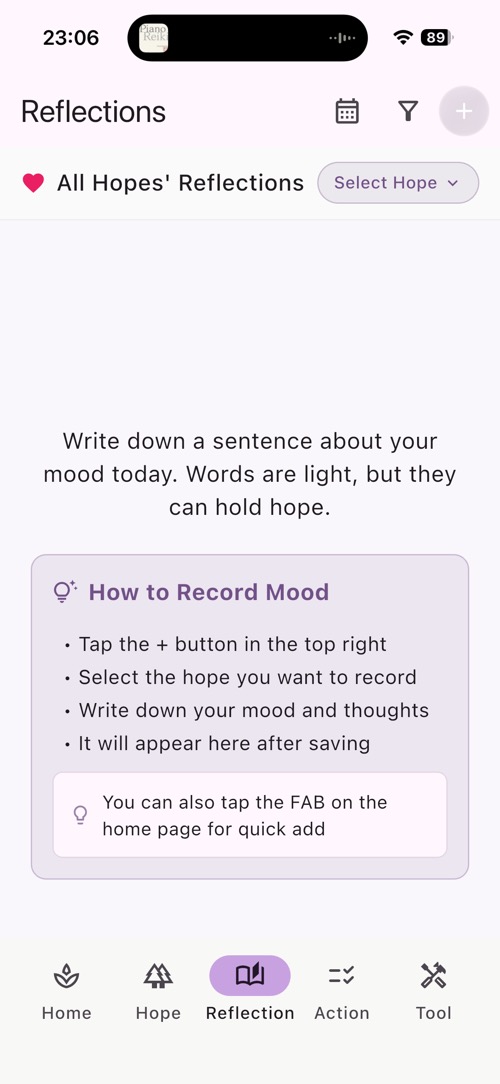
5 Viewing Reflection Page
Explore the reflection page to review all your insights.
- From Hope List, tap on a hope to view its details
- Tap on the "Reflection" tab item to go to the Reflection page
- See all reflections chronologically
- Tap to read full reflection content
- Edit or delete reflections as needed
Reflection Organization
The Reflection page shows all your insights and learnings for a specific hope, helping you track your journey and growth.
6 Adding Reflections
Add reflections to capture deeper insights and learning from your journey.
- From the Reflection page (see Step 5), tap the "+" button
- Write a reflection about your progress
- Note what worked, what didn't, and lessons learned
- Tap "Save" to add the reflection
- The new reflection will appear in the reflection list
Reflection Purpose
Reflections help users learn from their journey, celebrate wins, and adjust their approach for better results.

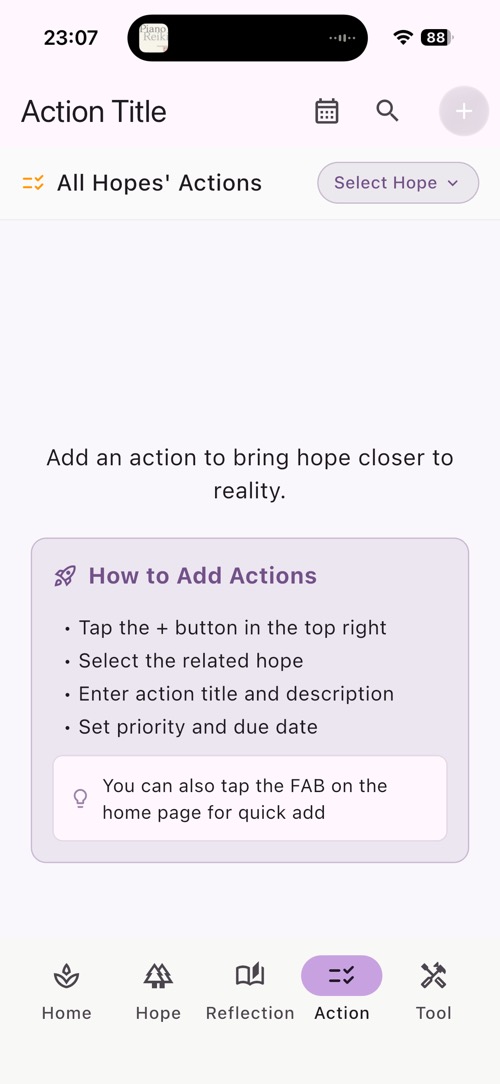
7 Viewing Action Page
Navigate to the Action page to manage action items for your goals.
- From Hope List, tap on a hope to view its details
- Tap on the "Action" tab item to go to the Action List
- View all actions associated with this hope
- Tap actions to mark them complete/incomplete
- Swipe or tap to delete actions
- Track your progress visually
Action Organization
The Action page shows all action items for a specific hope, making it easy to see what steps you need to take to achieve your goal.
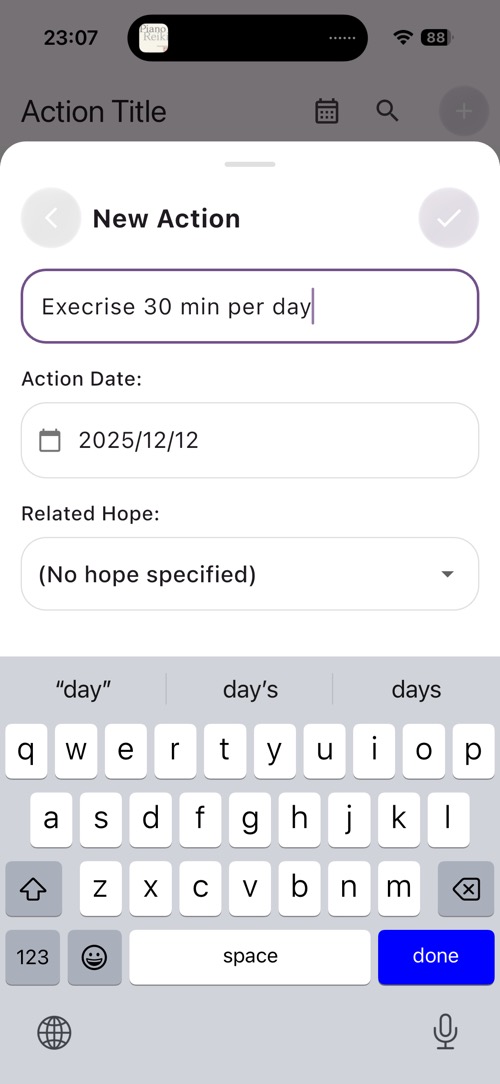
8 Creating Action Items
Add action items to break down your goals into manageable steps.
- From the Action page (see Step 7), tap the "+" button
- Enter an action title (e.g., "Research online courses")
- Add notes or details (optional)
- Tap "Save" to add the action
- The new action will appear in the action list
- Mark actions as complete by tapping them
Action System
Actions help break down big goals into manageable steps. You can add multiple actions per hope and track your progress as you complete them.
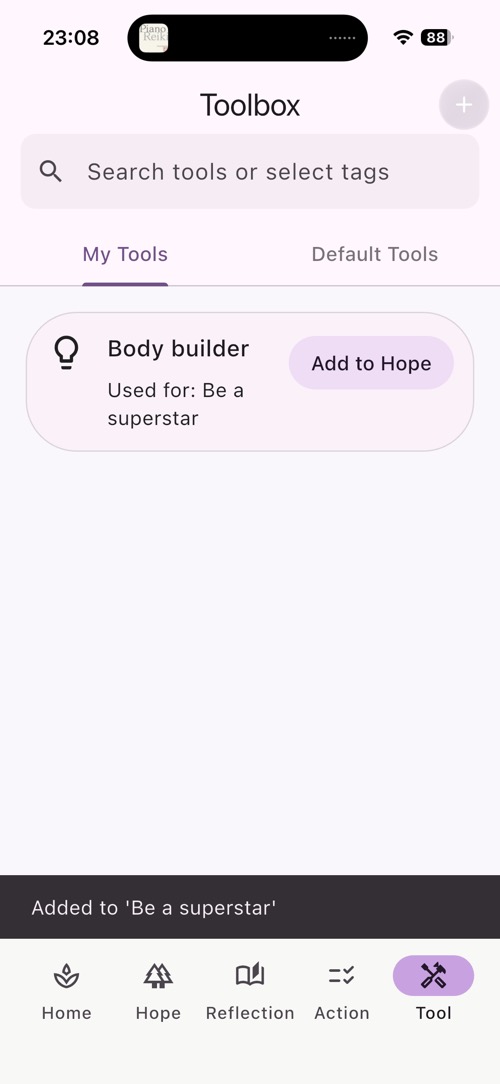
9 Managing Tools and Resources
Explore the Tools page to manage all your saved resources and links.
- Tap the "Tools" tab in the bottom navigation
- View all tools added manually or via Share Extension
- Tap any tool to view details and access the link
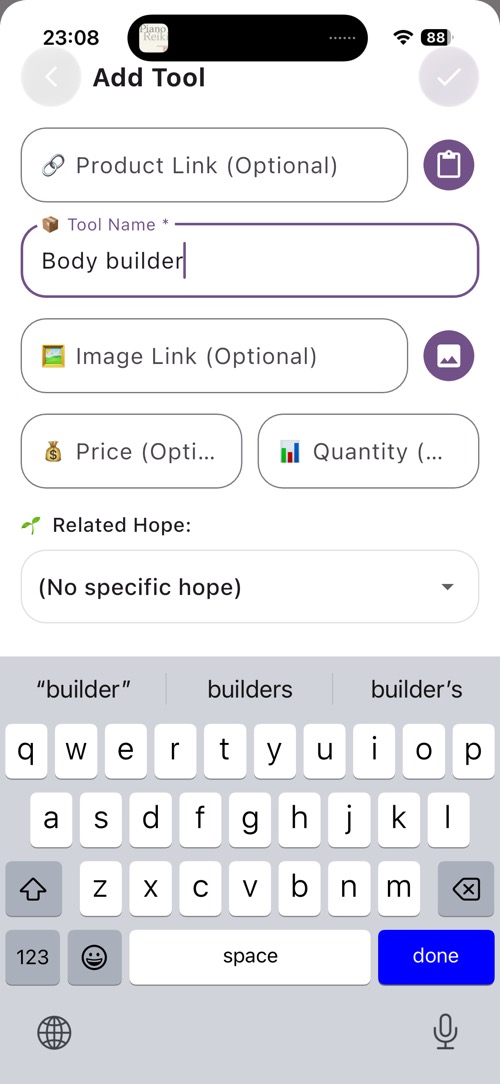
- Tap "+" to manually add a new tool or resource
- Enter tool name, description, and URL
- Tap "Save" to add the tool
- Swipe or tap to delete tools as needed
Tools Purpose:
Store helpful resources like tutorial videos, product pages, educational sites, or any web content that supports your goals. Keep everything you need in one organized place.
10 Share Extension
Share Extension feature to add web links from other apps directly to Hope Tree.
- Open Safari and navigate to any website (e.g., amazon.com, youtube.com, educational site)
- Tap the Share button (square with arrow pointing up)
- Scroll down and find "Hope Tree" in the share sheet
- Tap "Hope Tree" to share the link
- The app will open and automatically navigate to the Add Tool page
- The URL will be pre-filled in the tool form
- Add a name and description for the resource
- Tap "Save" to add the tool with the shared link
Share Extension Privacy
When you share a link to Hope Tree, the URL is saved locally on your device only. We do not track what links you share or visit. All data remains completely private.
Share Extension Use Cases
Users can share helpful resources like tutorial videos, product pages, articles, or any web content that supports their goals. All shared links are stored in the Tools section for easy access.
11 Exploring Diary Calendar
Navigate through your diary entries using the calendar view.
- Go to the Home page (tap Home tab in bottom navigation)
- Tap the "Calendar View" button on the top right corner
- View the calendar showing all your diary entries
- Dates with entries are highlighted
- Tap any date to view entries from that day
- Swipe between months to navigate
- View entry list below the calendar
Calendar Navigation
The calendar view makes it easy to see your journaling history at a glance and quickly access entries from specific dates.

12 Adding Daily Diary Entry
Create diary entries to record your daily thoughts and progress.
Option 1: From Calendar View
- In the Calendar View (see Step 11), tap the "+" button
- Write your thoughts, progress, or reflections
- Add photos if desired (stored locally)
- Tap "Save" to save the entry
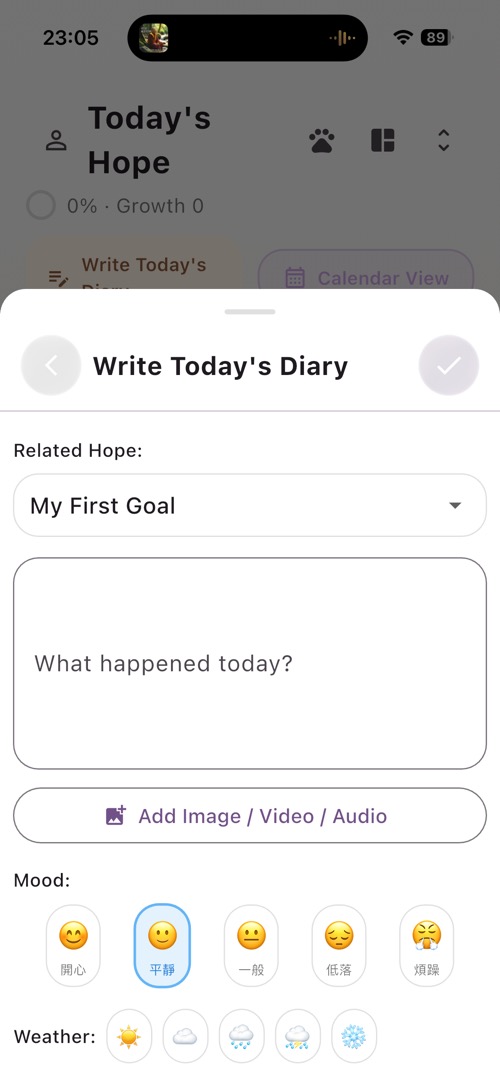
Option 2: From Home Page
- Go to the Home page
- Tap "Write Today's Diary" on the top left
- Write your thoughts, progress, or reflections
- Add photos if desired (stored locally)
- Tap "Save" to save the entry
- The entry will appear in the calendar on today's date
Private Journaling:
All diary entries are stored locally on your device. No one can access your private thoughts - not even us. Your journal is completely private.
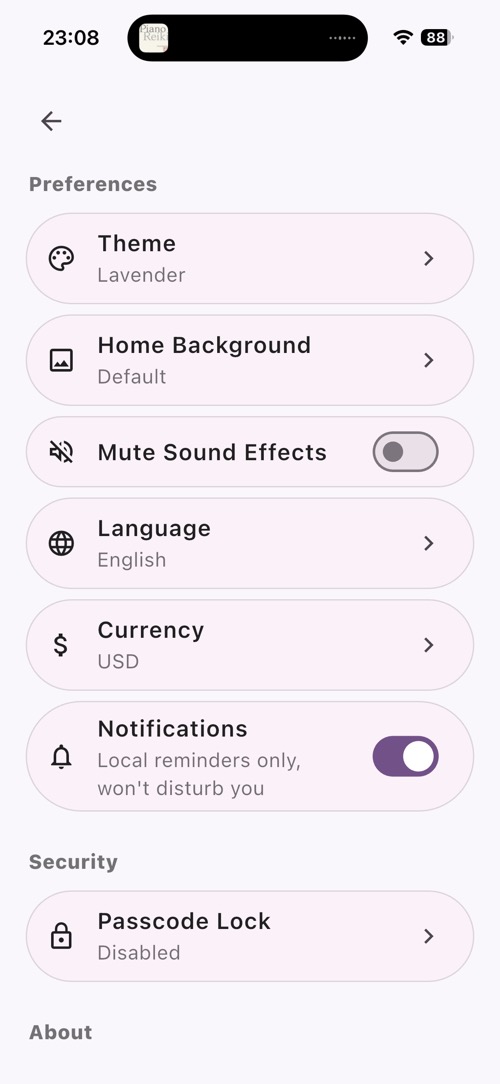
13 Customizing with Themes
Theme customization feature with 14 beautiful color options.
- Tap the "Profile" tab in the bottom navigation
- Tap on "Settings" or the gear icon
- Navigate to "Theme" settings
- Browse through 14 available themes
- Tap any theme to preview and apply it
- Observe the app's colors change instantly
- Try different themes: Warm, Summer, Forest, Winter, Calm, Sakura, Matcha, Wisteria, Midnight, Sage, Coral, Mint, Peach, Lavender
Theme Variety
The 14 themes allow users to personalize their experience and find colors that inspire them. All themes are included for free.